Activity statement – Students will learn and practice essential colored pencil techniques (some of which can also be applied to painting, as well as chiaroscuro drawing) to create a realistic still life.

Lessons for visual art education – where it's about the process, not the product
Author: anita sagastegui

Activity statement – Students will learn and practice essential colored pencil techniques (some of which can also be applied to painting, as well as chiaroscuro drawing) to create a realistic still life.

Description of the Unit – Students observed and discussed Vincent van Gogh’s famous painting, Starry Night, and, using what they noticed in the painting regarding color, texture and movement, attempted to recreate it in oil pastel.


Description of the Unit – Students learned all about the element of texture in art, both two- and three dimensional. They created textured mountains out of ripped paper and rubbing stencils, and then added the soft, wispy texture of the aurora borealis and the lake below using chalk pastels and brushes.


Description of the Unit –
This is one of my favorite art units to teach, because it involves one of my favorite art forms to practice: linoleum block printmaking. There is something so satisfying about carving through that soft linoleum block, watching the shavings curl off the blade. Students love this art form, too, and always request it every year (I offer it as an elective).

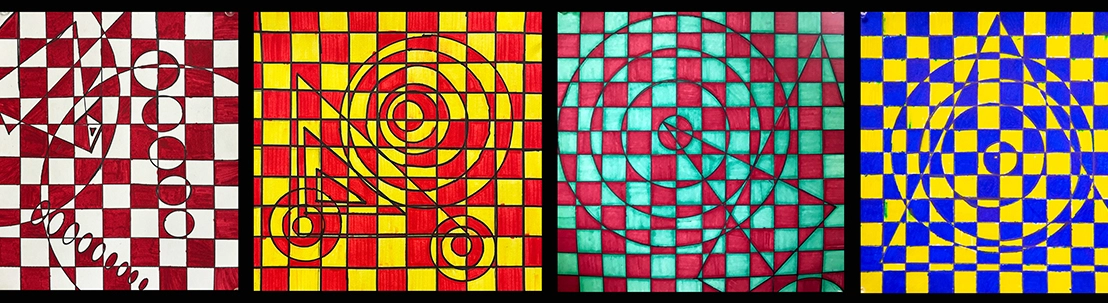
Description of the Unit – This delightful unit introduces students to optical illusion art. Students will observe and discuss different examples of optical illusion art, focusing particularly on the work of Bridget Riley. Using basic measurement skills, students will create their own two-color optical illusion design.


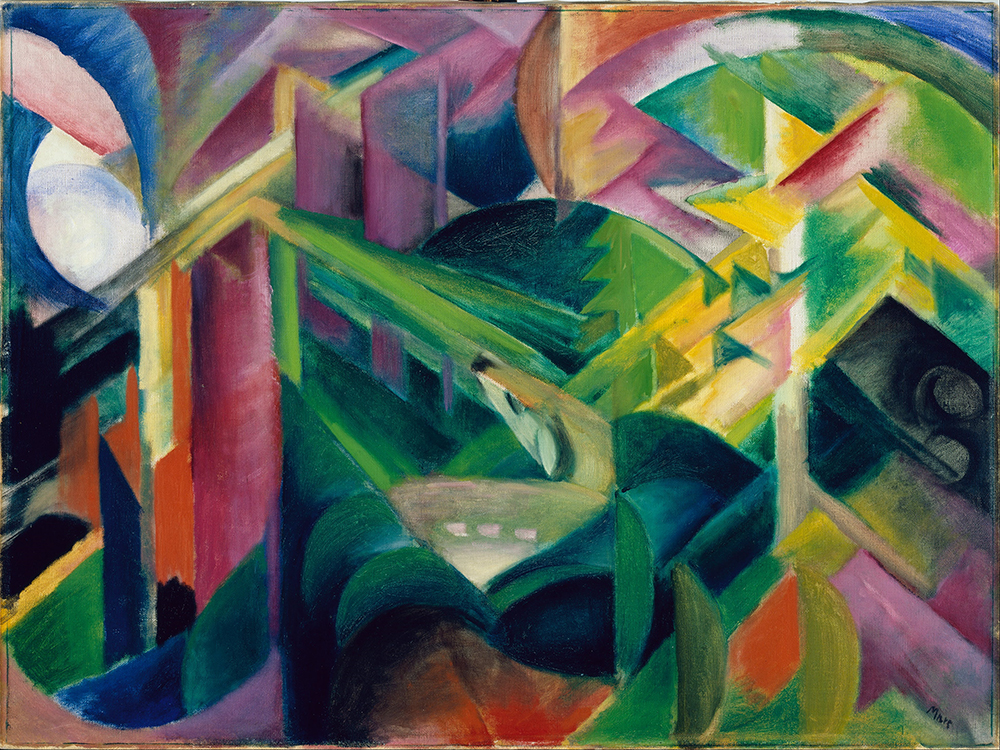
Description of the Unit – Students will explore the kaleidoscopic, expressionistic animal-centered paintings of Modern artist Franz Marc, applying the same concepts to their own compositions in oil pastel.

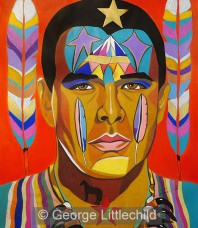
Description of the Unit – Students will create fantastical, energetic self-portraits inspired by the portraits of George Littlechild. Students will use a mix of sharpie markers, colored pencils, watercolor and acrylic paint for their portraits.

Description of the Unit – Students will learn about oil’s resistance to water both in nature and through the media of watercolor and crayon, and explore this resistance via playful experimentation and one finished composition.

Continue reading “Kindergarten – Simple Watercolor Resist”

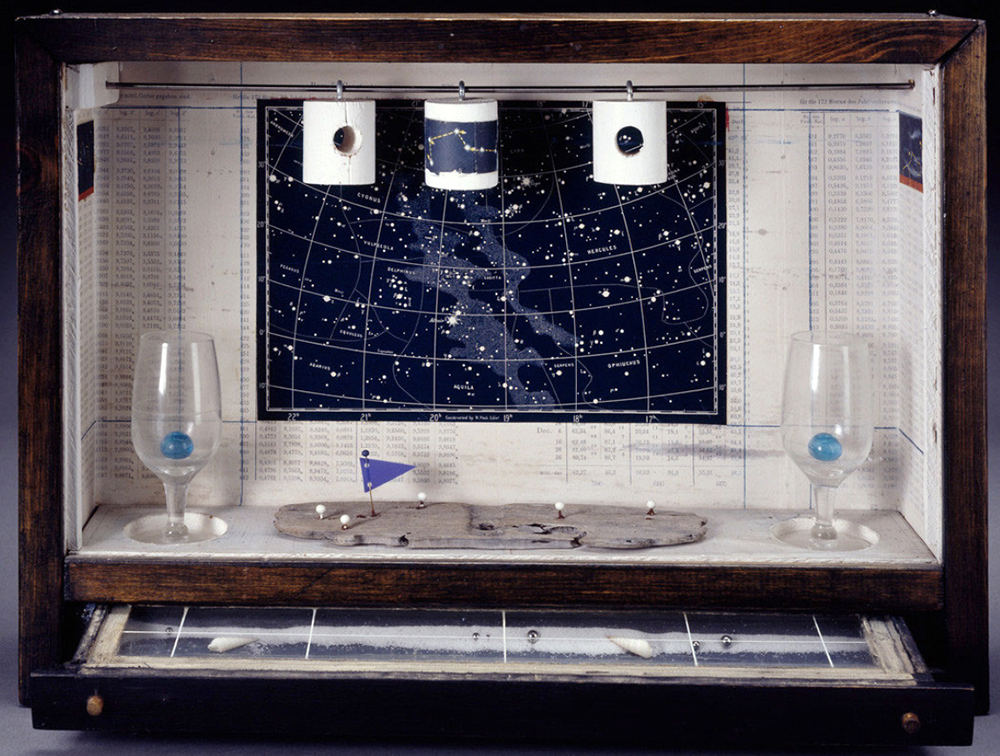
Description of the Unit – Students will observe and discuss Joseph Cornell’s memory boxes, and, gathering their own personal objects, found objects and other materials, students will thoughtfully create their own memory boxes.